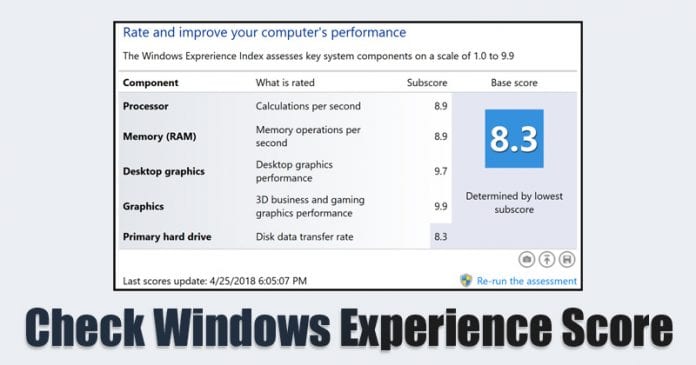
The Windows Experience Index is visible under the ‘Properties’ section of My Computer. However, Microsoft removed the graphic version of the Windows Experience Index with Windows 8.1. For those who don’t know, Windows Experience Index uses WinSAT, which stands for Windows System Assessment tool to measure the capability of your PC’s hardware and software information. So, WinSAT is already there in Windows 8 and Windows 10. That means you can still get the Windows Experience Index Score in Windows 10 computer. So, in this article, we have decided to share a working method that would help you access the old performance ratings easily on Windows 10 computers.
How to Check Windows Experience Score on Windows 10
So, let’s check out how to find your Windows Experience Score on Windows 10 computer. Please keep in mind that the method given below only works on the latest version of the Windows operating system that’s Windows 10.
1. Use WinSAT To Generate Windows Experience Index
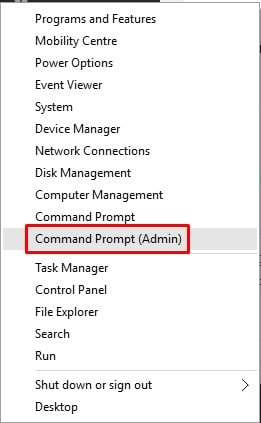
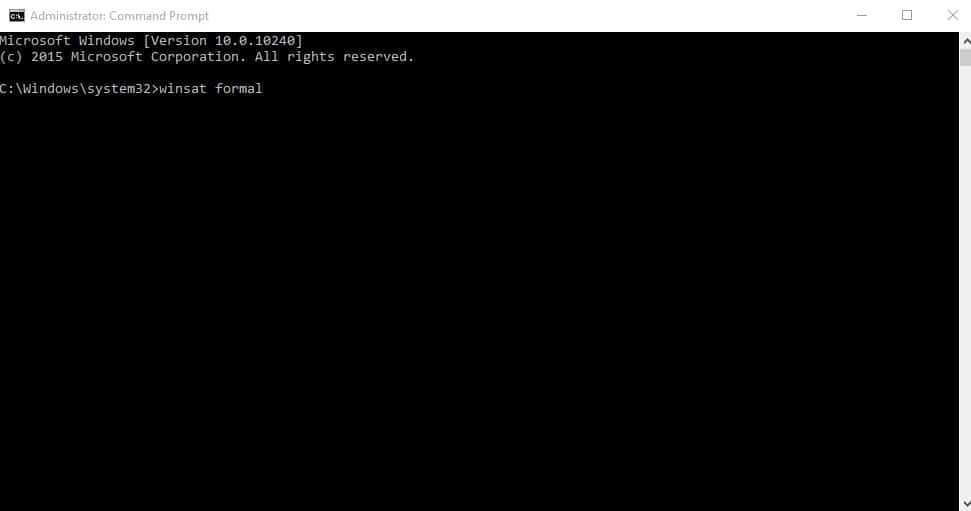
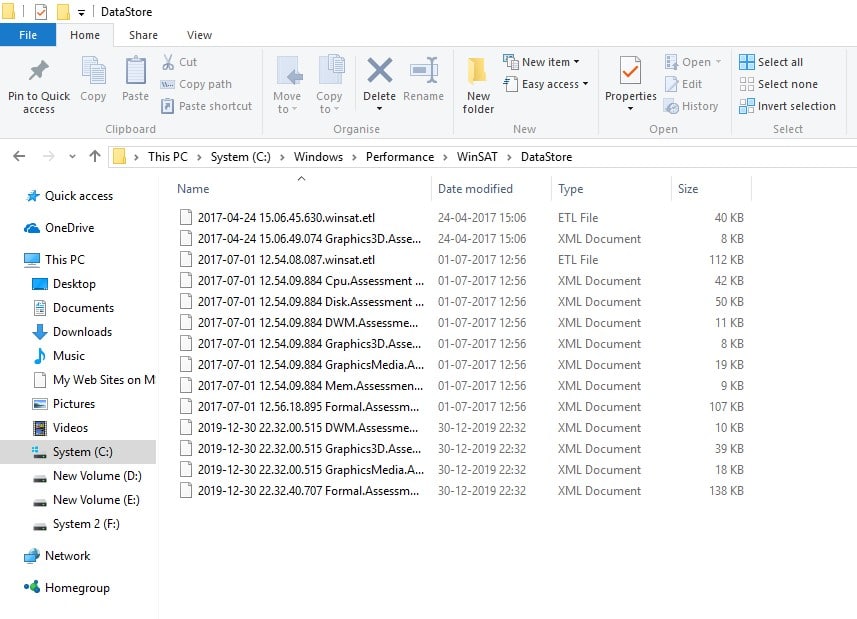
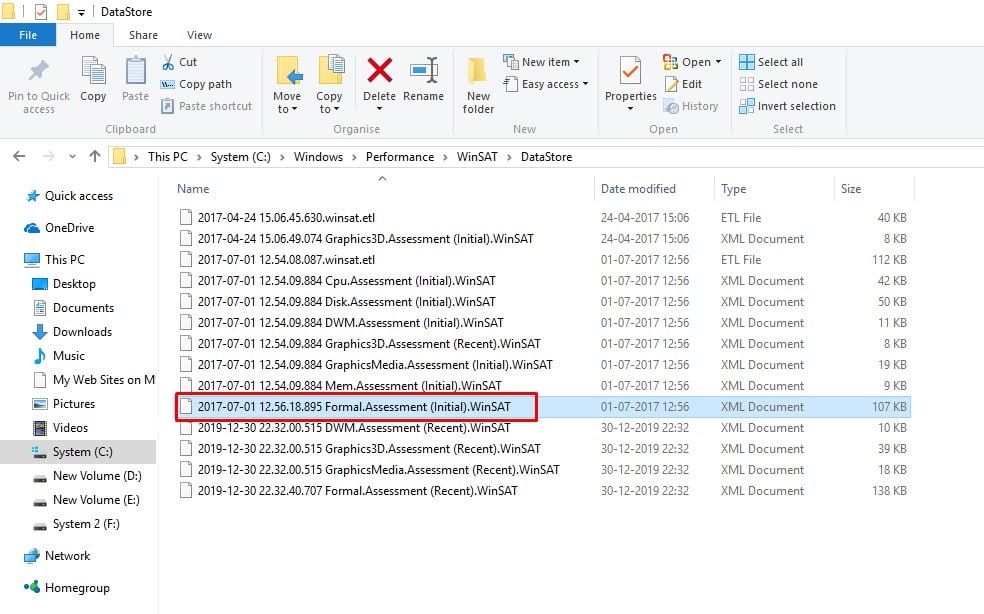
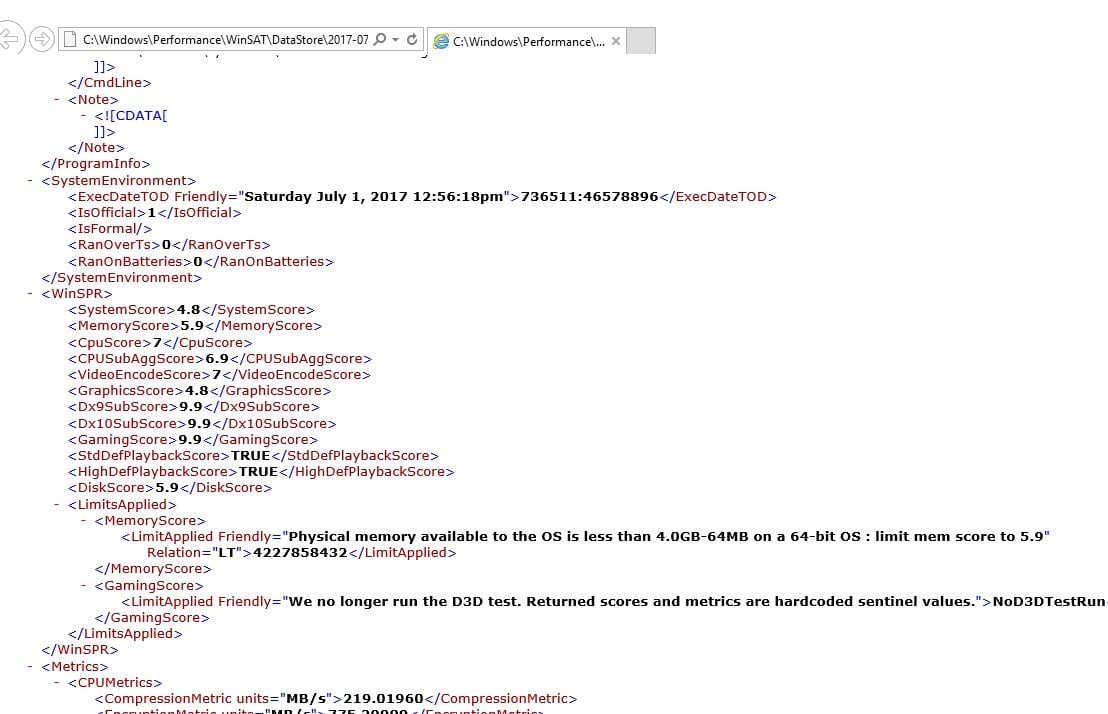
Well, as we have mentioned early in the post, the Windows Experience Index uses the Windows System Assessment Tool to find out the Experience Score. So, in this method, we are going to run WinSAT to Generate Windows Experience Index 2019. Step 1. First of all, right-click on the Start Button and select ‘Command Prompt (Administrator Mode)’ Step 2. On the Command Prompt, you need to enter the command – winsat formal Step 3. Wait until the process completes, once done it will generate an XML file which is located in C:\Windows\Performance\WinSAT\DataStore Step 4. Head to the given location and look for a set of files containing the data you are running the text. Use your internet browser to open the file that would look like “[date of test] Formal.Assessment (Recent).WinSAT.xml” Step 5. The XML file will show you the Windows Experience Score index. That’s it! You are done. This is how you can use Command Prompt on Windows 10 to find your Windows Experience Score index.
2. Using Powershell
Well, if you don’t want to rely on the XML file, then you can use this method. In this method, we are going to use Powershell to use the WinSAT command in Windows 10. So, let’s check out how to use Powershell to find out the Windows Experience Score index in Windows 10 computer.
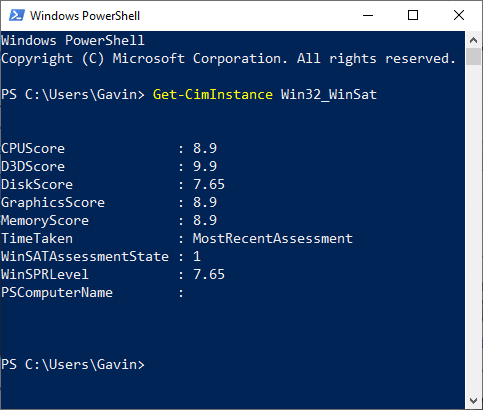
First of all, open the Windows Powershell as an Administrator. Next type in the following command Get-CimInstance Win32_WinSat Now you will see the Windows Experience Score in the PowerShell Window.
That’s it! you are done. This is how you can check your Windows Experience Score on Windows 10 computer.
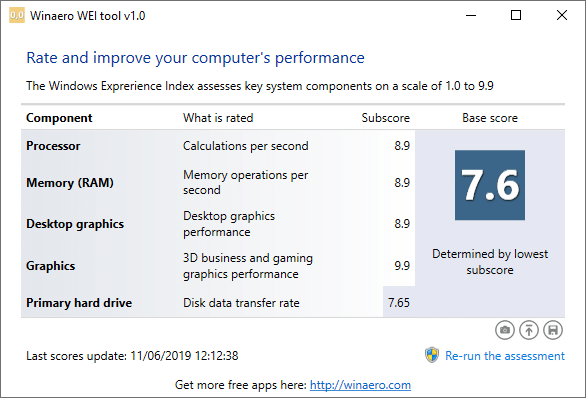
3. Using Winaero WEI Tool
Well, this is a third party tool that comes handy while generating a visual Windows Experience Index. It’s a lightweight tool and shows the Windows Experience Score index in no-time. Some other software for the same purpose exists, but the Winaero WEI tool is best amongst all. So, it’s another best option that you can consider. So, this is all about how to check your Windows Experience Score Index in Windows 10 computer. If you have any doubts related to this, let us know in the comment box below.
Δ